Written By

Fluent Frame Team
CEO, Fluent Frame
Date
Read Time
23 minutes
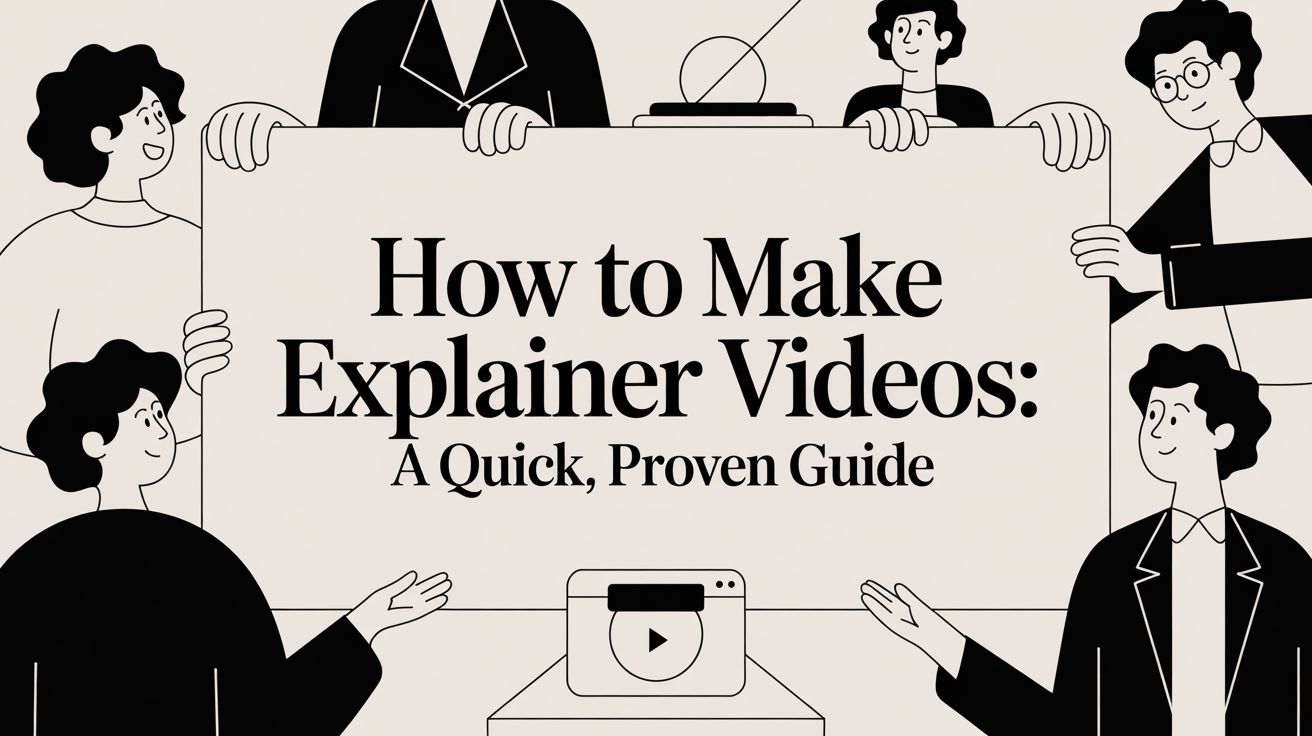
Creating a great explainer video boils down to a few core elements: a solid story, a simple visual plan, a clear voiceover, and the right software to bring it all together. Thankfully, modern tools, especially those powered by AI, have taken the technical headache out of the process. This means just about anyone can now produce a professional-looking video in no time.
Why Explainer Videos Actually Work
Before we get into the nuts and bolts of making one, let’s talk about why you should even bother. Explainer videos have moved from being a “nice-to-have” marketing perk to a must-have tool for any business looking to grow. They excel at one thing: turning complex ideas into simple, memorable stories that grab attention and get people to act.
For any company trying to cut through the digital noise, a sharp explainer video is often the difference between a confused visitor clicking away and a confident new customer signing up.
The real magic here is how they build understanding and trust. When you clearly show what your product does and what problem it solves, you create an immediate connection. This kind of clarity is incredibly powerful for:
- Boosting conversions: A video on a landing page can be a game-changer, quickly answering a visitor’s biggest questions and giving them the confidence to click “buy” or “sign up.”
- Smoothing out user onboarding: A simple visual guide helps new customers get started with your product right away. This means fewer support tickets for you and happier, more engaged users.
- Making your brand stick: The mix of visuals, sound, and story lodges your message in a viewer’s memory far more effectively than text alone ever could.
The Proof is in the Numbers
This isn’t just a hunch; it’s a massive shift in how people want to consume information. While blog posts and infographics still have their place, video just delivers a whole different level of engagement.
The market for explainer video software is expected to explode from USD 6.4 billion in 2024 to a staggering USD 26.3 billion by 2033. This growth is happening for a reason: animated content has been shown to increase viewer engagement by as much as 80% compared to static slides or text.
The Tools Have Finally Caught Up
This boom is largely fueled by new technology that has made video production accessible to everyone. Not too long ago, creating a professional animation meant hiring a specialized team and waiting weeks, or even months, for the final product.
Today, AI and no-code platforms have completely flipped the script. These tools are the driving force behind 71% of the market’s revenue growth, as they’ve helped cut the average production timeline from a lengthy 12 weeks down to just three. You can learn more about these market projections and see the full data analysis of these findings.
What this all means is that marketers, founders, and educators can now create high-quality, on-brand videos all by themselves, often in a single afternoon. Think of this guide not just as a creative tutorial, but as a practical roadmap for creating a powerful business asset that delivers real results.
Nailing the Plan and Script: Your Video’s Foundation

I’ve seen it a hundred times: gorgeous, expensive animation wasted on a video with no clear point. The hard truth is that the most critical work happens long before you ever touch an animation tool. Your video’s success hinges entirely on a sharp plan and a script that connects with your audience.
It’s tempting to jump straight into the fun stuff, but you have to resist. The biggest mistake you can make is trying to do too much. A video that tries to generate leads, onboard new users, and build brand awareness all at once will fail at all three. It just creates confusion.
So, start by picking one job for your video. Just one. Is its purpose to get sign-ups on a landing page? Or is it meant to live in your help docs to cut down on support tickets? Nailing down this single objective is your north star, it will guide every decision you make from here on out.
Get Specific About Your Audience and Their Problem
Once you know your goal, it’s time to get crystal clear on who you’re talking to. “Small business owners” isn’t an audience; it’s a category. You need to get more granular.
Think about a specific person. Maybe it’s a freelance graphic designer who’s completely overwhelmed by managing invoices and project deadlines. When you can picture that person, you can speak directly to the problems that keep them up at night.
A great explainer video doesn’t just list your features. It shows your product as the obvious answer to a real-world headache they’re dealing with right now. This empathy is what builds a connection and makes your viewer feel truly understood.
Writing a Script That Actually Converts
With your goal and audience locked in, you can finally start writing. And don’t sweat it, you don’t need to be a professional screenwriter. The most effective explainer scripts all follow a simple, proven formula.
It works because it follows the natural rhythm of a persuasive conversation: identify a shared problem, introduce the solution, show how it works, and tell them what to do next.
Research confirms what we already know: people want answers. A study found that 98% of people have watched an explainer video to learn about a product. A tight script gives them the answers they’re looking for, fast.
Keep it brief. The sweet spot for most marketing explainers is 60 to 90 seconds. That translates to a script of roughly 150-220 words. Go any longer, and you’ll start losing people before you even get to your call to action.
The 4-Part Explainer Video Script Formula
To make things even easier, I’ve broken down this structure into a simple table. Think of it as your cheat sheet for writing a script that hits all the right notes.
| Script Section | Purpose | Example Prompt |
|---|---|---|
| The Problem | Connect with your audience by describing a pain point they know well. | ”Struggling to keep track of client feedback spread across emails, texts, and project management tools?” |
| The Solution | Introduce your product or service as the clear and simple answer. | ”Meet ReviewFlow, the one platform that centralizes all your project feedback in a single, organized space.” |
| How It Works | Briefly show (don’t just tell) 2-3 key steps or features that deliver the solution. | ”Simply share a project link, and your clients can leave comments directly on the design. All feedback is automatically turned into a to-do list.” |
| Call to Action | Tell the viewer exactly what to do next with a clear, direct command. | ”Stop chasing feedback and start designing. Sign up for your free trial of ReviewFlow today!” |
This framework is your guardrail. It stops you from getting bogged down in jargon or listing every single feature your product has. Instead, it forces you to stay laser-focused on the value you deliver, which is the only thing your audience really cares about.
Your explainer video is a short, powerful pitch. By getting the script right, you respect your viewer’s time and give them the clarity they need to take the next step. With a solid script in hand, the rest of the production process becomes so much smoother.
From Script to Screen: Storyboarding and Voiceover

With a polished script in hand, it’s tempting to jump straight into animation. But hold on. The next two steps, storyboarding and voiceover, are where your video truly starts to take shape. This is the crucial bridge between the words on the page and the final product.
Think of it this way: these elements create the blueprint. They work together to establish the pacing, emotional tone, and visual rhythm of your video. I’ve seen countless projects get bogged down in endless revisions simply because this planning stage was rushed. A little foresight here will save you a ton of headaches later.
Visualize the Narrative with a Storyboard
Storyboarding isn’t as complicated as it sounds. You’re essentially drawing a simple comic strip of your video. And no, you don’t need to be a professional artist. Stick figures and basic shapes are all you need to map out what the audience will see as each line of the script is spoken.
This process forces you to think visually, scene by scene. It’s the best way to spot awkward transitions or gaps in your story before you’ve sunk hours into animating them.
For example, if your script says, “Our software centralizes all your scattered project feedback,” your storyboard could have a quick sketch of messy email and chat icons being pulled into one clean, organized dashboard. The visual tells the story instantly, even in its simplest form.
Find the Right Voice for Your Brand
Your voiceover is the heart and soul of your explainer. It’s not just about reading words; it’s about setting a mood. Do you want to sound energetic and inspiring, or calm and reassuring? The voice you choose defines your brand’s personality for the viewer.
A talented narrator can make even basic animation feel trustworthy and engaging. On the flip side, poor audio or a voice that doesn’t match your message can make the entire video feel cheap and unprofessional, no matter how great the visuals are.
A great voiceover is a powerful tool for building trust. In fact, research shows that 65% of YouTube users feel more trust in a brand after watching one of its explainer videos, and the narrator’s voice is a huge part of forging that connection.
When it comes to the audio, you have two main options: record it yourself or hire a professional.
DIY Recording vs. Hiring a Pro
The choice between a DIY voiceover and hiring a professional really boils down to your budget, timeline, and how polished you need the final product to be. Both are perfectly good options, but they fit different scenarios.
- DIY Recording: This is your fastest and most affordable route. If you have a clear, confident speaking voice and can find a quiet spot to record, you can get surprisingly good results with a decent USB microphone and some basic editing.
- Hiring a Pro: Using a platform like Upwork or Voices.com opens the door to thousands of professional voice actors. This path guarantees a high level of polish and lets you find a voice that perfectly aligns with your brand’s character.
Here’s a quick breakdown to help you decide:
| Factor | DIY Recording | Hiring a Professional |
|---|---|---|
| Cost | Low (cost of a USB mic) | Moderate ($100 - $500+ per minute) |
| Speed | Fast (can record immediately) | Slower (requires casting and review) |
| Quality | Variable; depends on skill and gear | Consistently high and professional |
| Best For | Internal videos, tight budgets, quick turnarounds | Key marketing assets, brand videos, premium content |
Whichever route you take, pay close attention to your pacing. Read the script out loud and time yourself. A comfortable, conversational speed is typically around 150 words per minute. Rushing the narration is a rookie mistake that makes it hard for viewers to keep up. Give your message room to breathe.
Choosing the Right Tools for Your Project

Alright, you’ve done the heavy lifting with your script and storyboard. Now comes the fun part: picking the software that will actually bring your explainer video to life. This is a big decision, and it’s about more than just features, it’s a call that will shape your budget, timeline, and the polish of your final video.
You’ve basically got three roads you can go down: traditional animation software, DIY platforms, or the new wave of AI video generators. Each has its place, and knowing the pros and cons will help you pick the right one for your specific project.
The Professional Animator’s Toolkit
When you see those slick, custom animations from big brands, they’re almost certainly made with tools like Adobe After Effects. This is the industry standard for a reason. It’s what professional motion designers and agencies use to create completely original, high-end work.
With this kind of software, your creative ceiling is practically nonexistent. If you can dream it up, a skilled animator can build it. But all that power comes with a price.
- Who it’s for: Professional animators, large creative teams with in-house motion designers, and companies with deep pockets and long production timelines.
- The catch: The learning curve is a mountain. We’re talking hundreds of hours to get good. The costs are also significant, from the software subscription to the salary of the expert you’ll need to hire.
For most teams just looking to create an explainer video, this route is complete overkill. It’s like buying a professional film camera to shoot a quick video for social media, it’ll work, but it’s far more tool than you need.
The DIY Drag-and-Drop Route
For years, the go-to for non-designers has been user-friendly DIY platforms. These tools work with a simple drag-and-drop system, giving you a library of pre-made scenes, characters, and icons you can piece together.
These platforms hit a sweet spot. They give you far more creative control than a basic video editor but don’t demand the years of training that professional software does. It’s a solid trade-off between convenience and customization.
This is a great option for marketers or small business owners who need a decent-looking video without a huge budget or a long wait. The main drawback? You’re stuck with the platform’s art style, which can make your video look a bit generic and hard to distinguish from others.
The New Frontier: AI Video Generators
The most recent and fastest-growing option is AI video generation. This approach flips the entire process on its head. Instead of manually animating scenes or picking from templates, you just tell the AI what your video is about, and it generates the visuals for you.
This technology is moving incredibly fast. The global AI video generator market is expected to rocket from $534.4 million in 2024 to over $2.5 billion by 2032. That’s a massive 19.5% annual growth rate, driven by one simple fact: AI slashes production time. We’ve seen projects that used to take 12 weeks get done in just three.
AI platforms are no longer a novelty; they are a legitimate production tool. For creators and marketers asking how to make explainer videos without a background in design, AI provides a powerful and practical answer.
What’s making these new AI tools so useful is how they solve real-world production headaches. For example, platforms like Fluent Frame use a style-locked system that automatically applies your brand’s colors, logo, and fonts to every single scene. This takes the pain out of maintaining brand consistency. You can compare different platforms in our guide to the top AI video generator tools.
Another game-changer is the ability to make surgical edits. With older AI tools, changing one word or tweaking the timing meant you had to re-render the whole video. Now, you can make tiny, precise changes on the fly, which makes the revision process feel fast and intuitive.
Here’s a quick breakdown to help you decide:
| Tool Category | Best For | Key Advantage | Major Drawback |
|---|---|---|---|
| Professional Software | Expert Animators | Unlimited creative control | Steep learning curve and high cost |
| DIY Platforms | Marketers & Small Teams | Easy to use with templates | Can look generic; limited by style |
| AI Generators | Anyone Needing Speed | Unmatched speed and efficiency | Can require prompt refinement |
Ultimately, the right tool comes down to your resources. If you have the in-house talent and time, professional software gives you ultimate control. If you need a solid video on a tight budget, DIY platforms are a reliable choice. But if you’re looking for speed, efficiency, and effortless brand consistency, AI generators are an incredibly powerful option to have in your corner.
Animating and Polishing Your Final Video

This is the part where all that prep work really shines. With a tight script, a clear storyboard, and a professionally recorded voiceover, you’re not inventing on the fly anymore. You’re simply assembling the pieces of a puzzle you’ve already solved.
The goal now is to bring everything together into a cohesive whole. It’s about making sure the visuals, audio, and branding all feel like they belong together, creating an experience that’s smooth and professional, not clunky and amateur.
Keep Your Branding Flawless
Before a single element moves, lock in your brand identity. This is non-negotiable. A consistent look builds trust and makes your video instantly feel like yours.
Your brand kit is your bible here. That means sticking to:
- Colors: Use your primary and secondary brand colors, and don’t be tempted to introduce new shades that muddy your palette.
- Fonts: Your designated brand fonts should be used for every piece of text on screen. This subtle consistency makes a huge difference.
- Logo: Place your logo where it makes sense, usually a quick appearance at the start or a prominent spot at the end. Just make sure it’s clean and legible.
This used to be a painful, manual task. Luckily, modern tools, especially AI platforms like Fluent Frame, often include style-locking features. You just set up your brand kit once, and the software applies those rules across the entire project. It’s a massive time-saver. If you want to see what this looks like, check out this gallery of AI-generated explainer videos to see how different brands pull it off.
Get the Sound Design and Audio Mix Right
With the visuals falling into place, it’s time to layer in the audio. Your voiceover is the star of the show, but background music and sound effects are the supporting actors that bring the whole thing to life. Get this wrong, and even the slickest animation will fall flat.
The key is to make sure your audio enhances the message, not overpowers it. The music should set a mood, whether it’s optimistic and energetic or serious and thoughtful, but it should never force your viewer to strain to hear the narration.
A classic rookie mistake I see all the time is mixing the background music way too loud. As a rule of thumb, your music track should sit around -18 to -20 dB, while your voiceover should be normalized to a much stronger -3 to -6 dB. This keeps the voice crystal clear.
You can find great royalty-free tracks on services like Epidemic Sound or Artlist. Look for instrumental music with a consistent energy level that won’t distract from your script.
Edit for Pacing and a Polished Finish
The final assembly happens in post-production. This is where you’ll trim the fat, tighten up the timing, and add the final touches that make your video feel truly professional.
Focus on these key editing tasks:
- Tighten the Pace: Snip out any awkward pauses or dead air in the voiceover. A snappy rhythm keeps viewers engaged. Make sure visual changes happen right on cue with the narration.
- Use Simple Transitions: Stick to clean cuts or subtle fades between your scenes. Flashy, over-the-top wipes and starbursts can make your video look dated.
- Add Supporting Text: Use on-screen text to highlight key numbers or takeaways, but keep it brief. Make sure it’s big enough to read on a phone and doesn’t linger on screen for too long.
- Nail the Call-to-Action (CTA): Your last scene needs to be crystal clear. Tell viewers exactly what to do next, whether it’s “Visit Our Website” or “Start Your Free Trial,” and display the URL prominently.
The best part about modern editing tools is the ability to make small tweaks without having to re-render everything. Fixing a typo or nudging an element a few frames over is now a quick fix, not a major headache.
When you’re all done, export your video as an MP4 file with the H.264 codec at 1080p. That’s the gold standard for just about every platform, from your website to your social media feeds.
How to Distribute Your Video for Maximum Impact
You’ve done it. Your video is exported, polished, and ready to go. It’s a great feeling, but the job isn’t quite finished. A brilliant explainer video with no audience is like a billboard in the desert, a fantastic piece of work that no one will ever see.
Your final move is to create a distribution plan that gets your video in front of the right people, on the right platforms, at exactly the right time. Tossing it on YouTube and hoping for the best is a recipe for disappointment. A smart strategy means tailoring your approach for each channel, because how you share a video on your homepage is completely different from how you’d post it on a fast-moving LinkedIn feed.
Optimize for Your Primary Channels
Every video needs a home base, and for most businesses, that should be your own website. Placing your explainer on your homepage or a key landing page gives you complete control over the viewer’s experience, no competitor ads, no distracting “watch next” videos pulling them away.
Beyond your site, YouTube is the undisputed king of video discovery. Getting your video optimized here is non-negotiable for reaching new people actively searching for what you offer. Think of your YouTube upload as a mini-SEO project.
- A Title That Grabs Attention: Don’t just use your product name. Frame it as a solution or a question. Something like, “How to Finally Organize Project Feedback in 60 Seconds,” works much better.
- A Description That Works for You: This is your space for keywords. Write a couple of solid paragraphs explaining the problem the video solves, who it’s for, and what viewers will learn.
- Smart, Relevant Tags: Mix it up. Use broad terms like “project management,” specific ones like your brand name, and video-type tags like “explainer video” or “product demo.”
Embed and Share Across Your Ecosystem
Once your video has its home base, it’s time to put it to work everywhere else. Embedding your video is one of the best ways to boost engagement across all your marketing channels.
For starters, look through your old blog posts. A well-placed video can break up a long article, add some visual flair, and dynamically explain a complex idea. We talk a lot more about giving old content a second life in our guide on how to repurpose podcast content into shareable video clips.
Email is another fantastic channel. Just including a video thumbnail in your newsletter can give your click-through rates a serious lift. Use it to announce your new product, share a compelling customer story, or simply welcome new subscribers with your shiny new video.
And if you’re wondering if all this effort is worth it, the data is overwhelmingly clear. A staggering 98% of people have watched an explainer video to learn more about a product or service. This isn’t just about getting views; it’s about driving real action. In fact, 87% of people report being convinced to make a purchase after watching a brand’s video. You can dig into more of these powerful video marketing statistics to see just how much video impacts consumer behavior.
Track What Matters and Prove ROI
Finally, you need to know if all this is actually working. To prove the value of your video, you have to track its performance. It’s easy to get distracted by “vanity metrics” like the total view count, but you need to focus on the numbers that connect directly to your business goals.
The metrics that truly matter aren’t just views; they’re engagement and action. Are people sticking around to watch your video, and are they doing what you want them to do afterward?
Here are the key things I always keep an eye on:
- Watch Time & Audience Retention: This tells you exactly how much of your video people are watching. If you see a huge drop-off in the first 10 seconds, your intro probably isn’t grabbing them.
- Click-Through Rate (CTR): For YouTube, social media, and email, this shows how many people saw your thumbnail and title and were compelled enough to click “play.”
- Conversion Rate: This is the big one. If your video is on a landing page, are viewers signing up, requesting a demo, or buying? This is the ultimate measure of your video’s ROI.
Even after you’ve mapped out your entire project, a few lingering questions always seem to come up. That’s perfectly normal. Let’s tackle some of the most common ones we get asked all the time.
How Much Does It Cost to Make an Explainer Video?
This is the big one, and the honest answer is: it depends. The price range is huge.
Going the traditional route with a creative agency can set you back anywhere from $5,000 to $50,000+, depending on the scope. If you decide to hire freelancers, you’re likely looking at a budget between $1,000 and $10,000.
But here’s the good news. Modern DIY software and AI-driven platforms have completely changed the game. You can now get a subscription for under $100 a month and produce a whole library of videos for what used to be a fraction of the cost of one.
What Is the Ideal Length for an Explainer Video?
For most marketing videos you’d put on your website or social media, the sweet spot is 60 to 90 seconds. That’s just enough time to get your main point across without losing your audience’s attention.
If you’re creating something more in-depth, like an internal training module or a detailed product tutorial, you can go longer. My advice, though? Break that longer content into a series of shorter, bite-sized videos. It’s way more digestible for the viewer.
But what if I have zero design skills? Can I still make a good video? Absolutely. This is exactly why new AI tools were created. You can literally just describe what you want in simple text, and the AI will generate a surprisingly polished animation for you, often pulling in your brand colors and logo automatically.
Ready to stop thinking about it and actually start creating? With Fluent Frame, you can take your ideas and turn them into professional, on-brand animations in just a few minutes. Seriously, no design skills needed. Try Fluent Frame for free and see just how easy it is.